Introduction
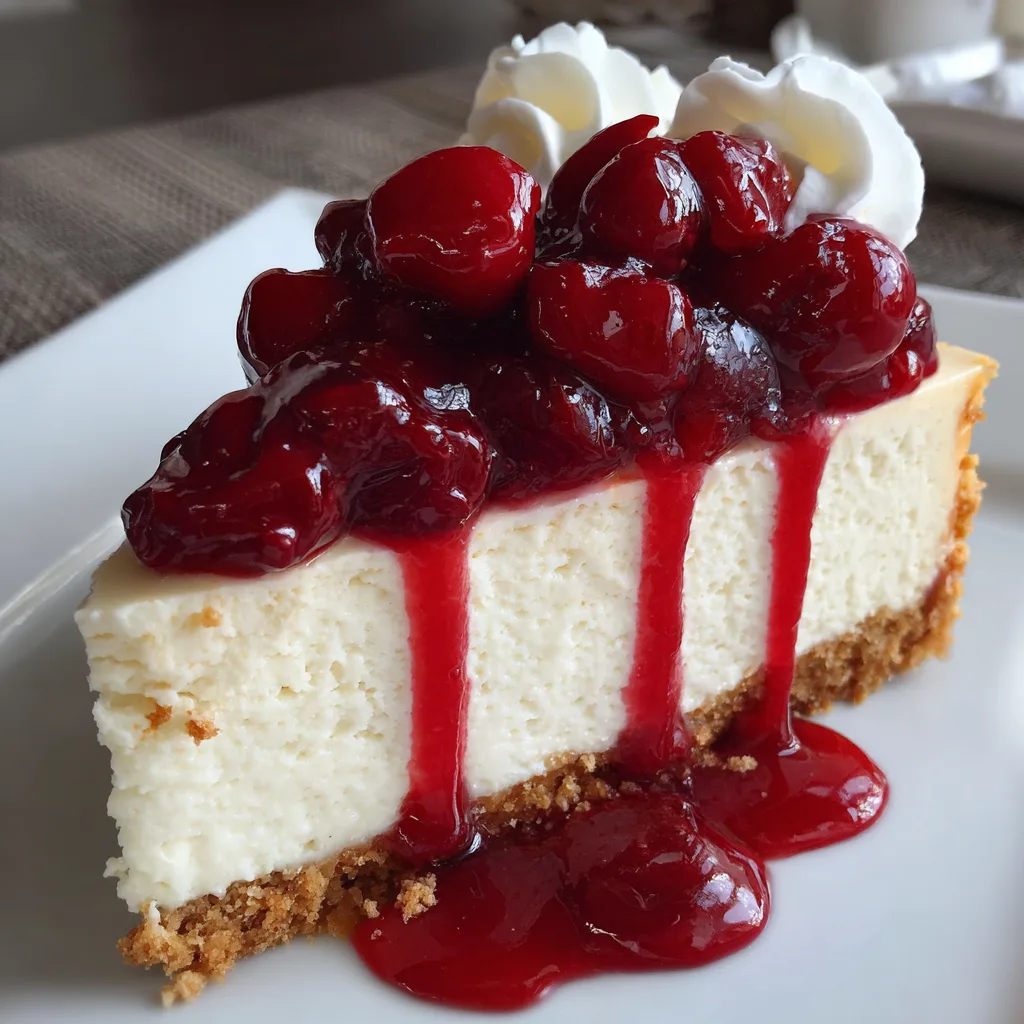
No-Bake Cherry Cheesecake is the perfect dessert when you want something indulgent without turning on the oven. It combines a buttery biscuit base, a smooth and creamy cheesecake filling, and a glossy cherry topping that adds both sweetness and colour. This dessert is especially convenient for warm days, holidays, or last-minute gatherings when time is limited but presentation still matters. I often make this cheesecake when I need a reliable crowd-pleaser that can be prepared ahead of time. The filling sets beautifully in the refrigerator, creating clean slices with a light yet rich texture. The contrast between the crunchy base, velvety cheesecake, and fruity topping makes every bite satisfying. Simple to prepare and visually appealing, this no-bake cherry cheesecake is a timeless dessert that never goes out of style.
Print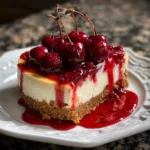
No-Bake Cherry Cheesecake: A Creamy, Effortless Dessert with Classic Flavour
- Total Time: 4 hours 20 minutes
- Yield: 8 slices
- Diet: Vegetarian
Description
No-Bake Cherry Cheesecake is a creamy, smooth dessert made with a buttery biscuit crust, rich cream cheese filling, and topped with sweet cherry pie filling—no oven required.
Ingredients
- 200 g graham crackers or digestive biscuits, crushed
- 100 g unsalted butter, melted
- 300 g cream cheese, softened
- 120 g powdered sugar
- 1 tsp vanilla extract
- 240 ml heavy whipping cream, cold
- 400 g cherry pie filling
- 1 tbsp lemon juice (optional)
Instructions
- In a bowl, mix crushed biscuits with melted butter until well combined.
- Press the mixture firmly into the bottom of a springform pan to form the crust. Chill for 20 minutes.
- In a large bowl, beat the cream cheese until smooth.
- Add powdered sugar, vanilla extract, and lemon juice, then mix until creamy.
- In a separate bowl, whip the cold heavy cream until stiff peaks form.
- Gently fold the whipped cream into the cream cheese mixture.
- Spread the filling evenly over the chilled crust.
- Top with cherry pie filling.
- Refrigerate for at least 4 hours or until fully set.
- Slice and serve chilled.
Notes
- For best results, chill overnight.
- You can substitute cherries with blueberries or strawberries.
- Use full-fat cream cheese for a firmer texture.
- Prep Time: 20 minutes
- Cook Time: 0 minutes
- Category: Dessert
- Method: No-Bake
- Cuisine: American
Why You’ll Love This Recipe
This recipe requires no baking, minimal preparation, and simple ingredients. It is creamy, well-balanced, and easy to make ahead of time. The cherry topping adds a classic finish that pairs perfectly with the smooth cheesecake filling.
Ingredients
(Tip: You can find the complete list of ingredients and their measurements in the recipe card below.)
Digestive Biscuits
Digestive biscuits create a sturdy, buttery base that contrasts perfectly with the creamy filling.
Butter
Butter binds the biscuit crumbs together and adds richness to the crust.
Cream Cheese
Cream cheese forms the heart of the cheesecake, providing a smooth, tangy, and luxurious texture.
Powdered Sugar
Powdered sugar sweetens the filling while keeping it light and smooth.
Vanilla Extract
Vanilla enhances the overall flavour and complements both the cream cheese and cherry topping.
Heavy Cream
Heavy cream is whipped and folded into the filling to create a light yet stable texture.
Cherry Pie Filling
Cherry pie filling adds sweetness, colour, and a classic fruit topping that finishes the cheesecake beautifully.
Directions
Crush the digestive biscuits into fine crumbs and mix with melted butter until evenly combined. Press the mixture firmly into the base of a springform pan and refrigerate to set.
In a large bowl, beat the cream cheese until smooth. Add powdered sugar and vanilla extract, mixing until fully incorporated.
In a separate bowl, whip the heavy cream until soft peaks form. Gently fold the whipped cream into the cream cheese mixture until smooth and airy.
Spread the cheesecake filling evenly over the chilled base and smooth the top. Refrigerate for at least four hours, or until fully set.
Once set, spoon the cherry pie filling over the top, spreading evenly. Slice and serve chilled.
Equipment needed
Must-Have Tools to Get Rolling
Large pot – You’ll need this to boil the whole cabbage head and soften the leaves.
large bowl –Spacious, durable large bowl ideal for mixing, serving, or food preparation. Made from sturdy material and easy to clean.
Sharp knife – For coring the cabbage and slicing out the thick stem in each leaf. A paring knife works best.
Mixing bowl – A big bowl makes it easier to combine your meat and rice filling evenly.
Cutting board – For prepping cabbage leaves and rolling them like a pro.
Full-Size Blender – is a powerful kitchen appliance for making smoothies, soups, and sauces in large batches.
3-in-1 Air Fryer – This versatile 3-in-1 air fryer offers Air Fry for healthier meals with less oil, Bake for bakery-quality desserts and treats, and Reheat to bring leftovers back to life with crispy, flavorful results
Servings and timing
This cheesecake serves approximately ten people. Preparation time is about 20 minutes, with a chilling time of at least four hours.
Storage/reheating
Store the cheesecake covered in the refrigerator for up to four days. This dessert does not require reheating and should always be served chilled.
Variations and Customizations
No-Bake Cherry Cheesecake is highly adaptable and easy to customise. You can substitute the cherry topping with strawberry, blueberry, or mixed berry filling for a different flavour profile. I have also made this cheesecake with a chocolate biscuit base, which added a deeper, richer contrast to the creamy filling.
For a lighter version, reduced-fat cream cheese can be used, though the texture may be slightly softer. Adding lemon zest to the filling creates a brighter, fresher flavour that pairs well with cherries. You can also portion the cheesecake into individual glasses or jars for elegant, single-serve desserts. These variations allow you to adjust the recipe to suit different occasions while keeping its classic appeal.
Nutrition and Dietary Info
This dessert is rich and indulgent, providing fats from cream cheese and cream along with carbohydrates from the biscuit base. Portion control is recommended. Gluten-free biscuits can be used to accommodate dietary needs.
Expert Tips & Customizations
Firm Base
Press the biscuit mixture firmly into the pan to prevent crumbling when sliced.
Smooth Filling
Ensure the cream cheese is fully softened before mixing to avoid lumps.
Proper Chilling
Allow enough chilling time so the cheesecake sets cleanly and slices neatly.
FAQs
Can I make this cheesecake ahead of time?
Yes, it can be prepared a day in advance and stored in the refrigerator.
Does it need gelatin to set?
No, the whipped cream and chilling time are sufficient.
Can I freeze no-bake cheesecake?
Yes, freeze without the topping and add it after thawing.
What can I use instead of digestive biscuits?
Graham crackers or similar biscuits work well.
Why is my cheesecake too soft?
Insufficient chilling or overmixing the whipped cream can cause softness.
Can I use fresh cherries?
Yes, but they should be cooked into a topping first.
Is this dessert very sweet?
It is balanced, but sweetness can be adjusted slightly.
Can I make mini cheesecakes?
Yes, individual portions work very well.
How do I get clean slices?
Use a sharp knife wiped clean between cuts.
Can I add chocolate?
Yes, chocolate shavings or a drizzle pair well with cherries.
Conclusion
No-Bake Cherry Cheesecake is a timeless dessert that delivers rich flavour and elegant presentation with minimal effort. Its creamy texture, crisp base, and fruity topping make it a reliable choice for entertaining or everyday treats. Easy to prepare and even easier to enjoy, this cheesecake is a recipe you will return to whenever you need a stress-free yet impressive dessert.
Hungry for more? Visit our website for full recipes and follow us on Pinterest for daily foodie inspo you’ll love to pin!