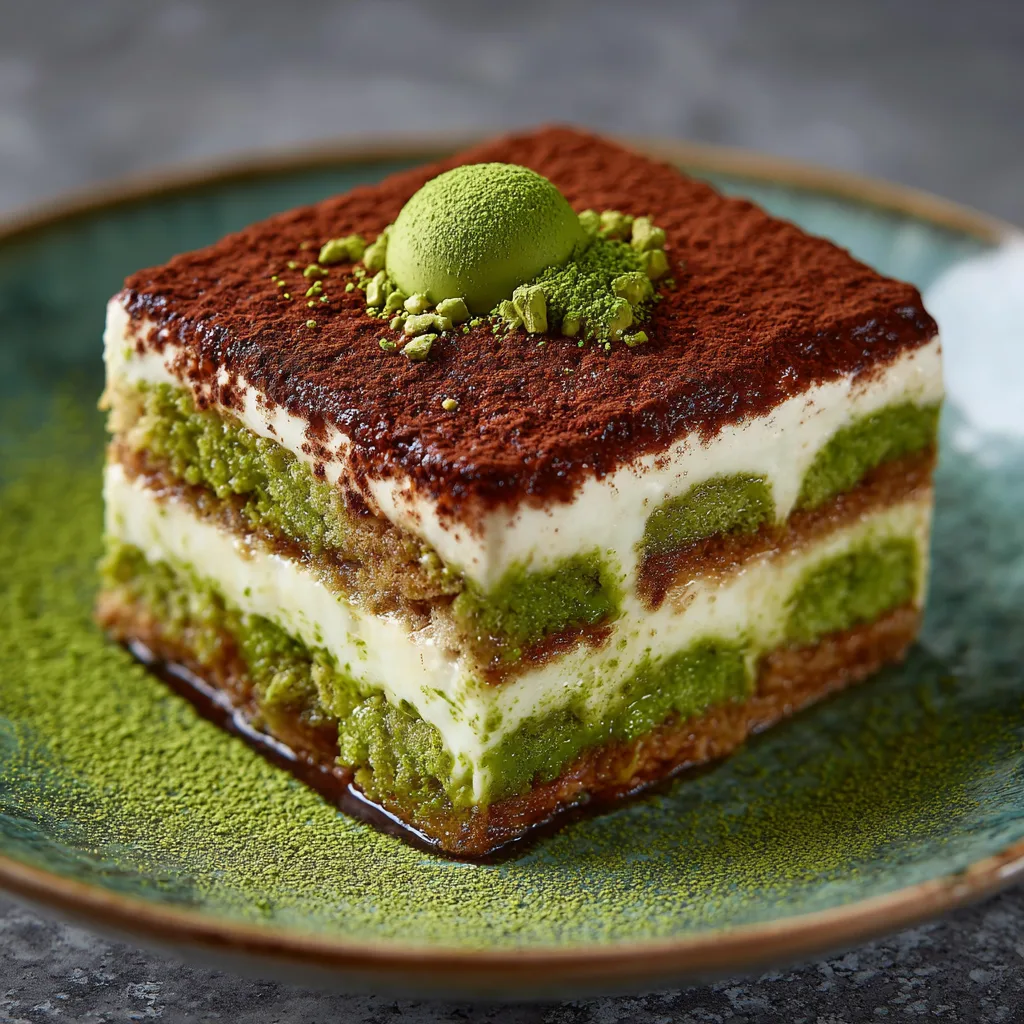
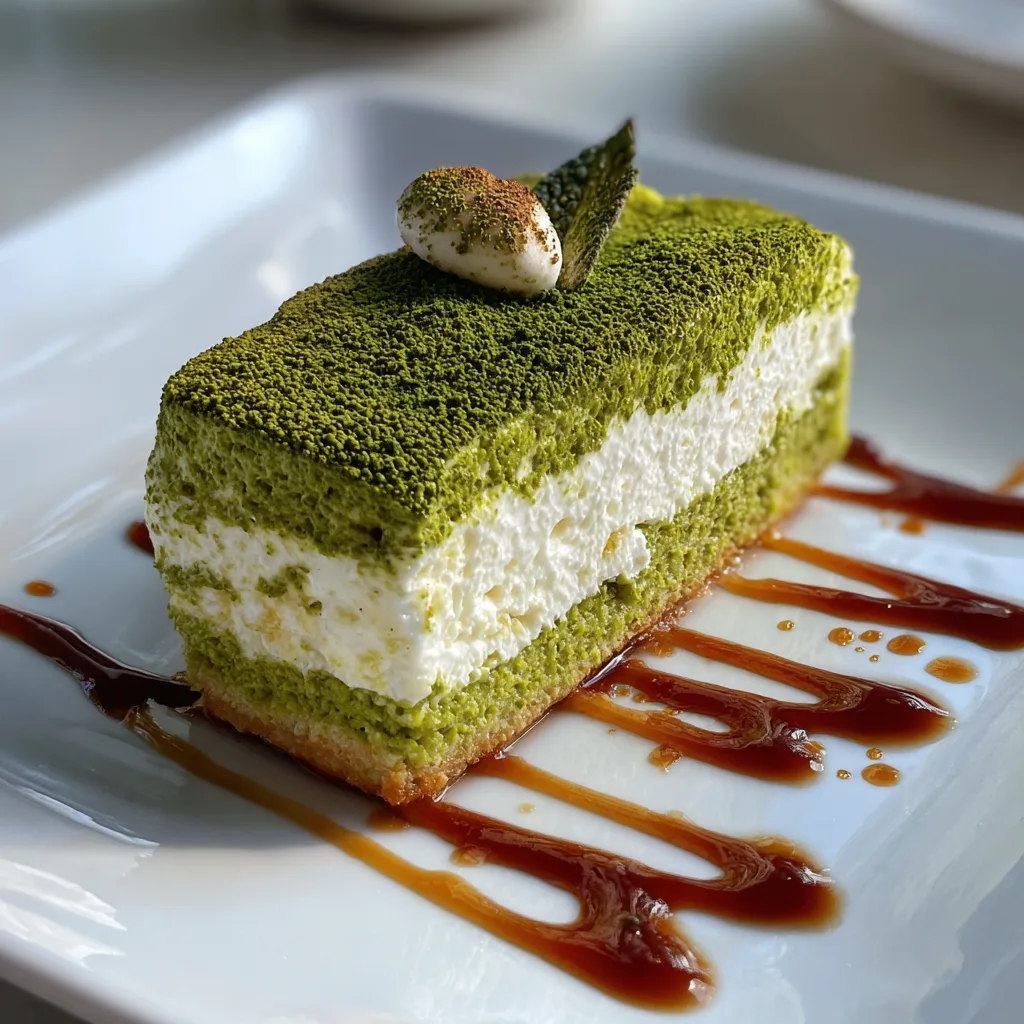
Matcha Tiramisu is a refined and modern interpretation of the traditional Italian favorite. Instead of espresso and cocoa, this version highlights the delicate, earthy notes of matcha layered between soft ladyfingers and a rich mascarpone cream. The result is a dessert that feels both indulgent and balanced, with subtle bitterness complementing the sweetness of the cream.
The first time I prepared matcha tiramisu, I was impressed by how beautifully the flavors blended after resting in the refrigerator. The matcha infused the layers gently, creating a dessert that was creamy yet refreshing. It is ideal for dinner parties, special occasions, or whenever you want something sophisticated without complicated baking. Since it requires no oven, it is also wonderfully convenient.
Print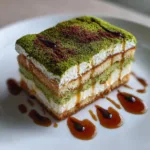
Matcha Tiramisu: A Creamy, Elegant Twist on the Classic Italian Dessert
- Total Time: 4 hours 20 minutes
- Yield: 8 servings
- Diet: Vegetarian
Description
Matcha Tiramisu is a creamy, no-bake Japanese-Italian fusion dessert featuring layers of matcha-soaked ladyfingers and mascarpone cream, finished with a delicate dusting of vibrant green matcha powder.
Ingredients
- 1 cup hot water
- 2 tablespoons matcha powder, divided
- 3 tablespoons granulated sugar (for matcha mixture)
- 8 ounces mascarpone cheese, softened
- 1 cup heavy whipping cream
- 1/3 cup powdered sugar
- 1 teaspoon vanilla extract
- 24 ladyfinger biscuits (savoiardi)
Instructions
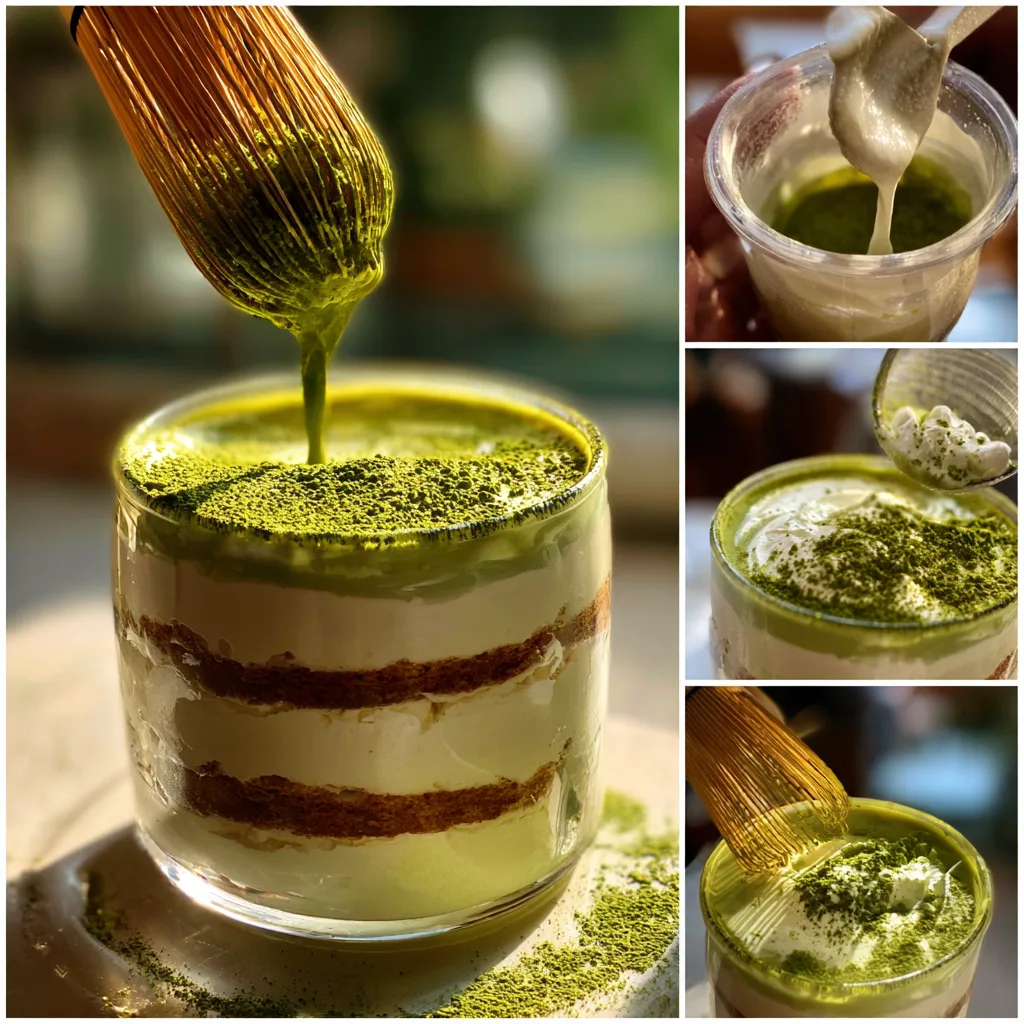
- In a bowl, whisk hot water with 1 tablespoon matcha powder and granulated sugar until smooth. Let cool.
- In a large bowl, beat heavy cream until soft peaks form.
- In another bowl, mix mascarpone, powdered sugar, and vanilla extract until smooth.
- Gently fold whipped cream into mascarpone mixture until combined.
- Quickly dip each ladyfinger into the cooled matcha mixture and arrange in a single layer in a dish.
- Spread half of the mascarpone cream over the ladyfingers.
- Repeat with another layer of dipped ladyfingers and remaining cream.
- Cover and refrigerate for at least 4 hours or overnight.
- Before serving, sift remaining 1 tablespoon matcha powder evenly over the top.
Notes
- Do not oversoak the ladyfingers to avoid sogginess.
- Use culinary-grade matcha for balanced flavor and color.
- Chilling overnight enhances flavor and texture.
- Store refrigerated for up to 3 days.
- Prep Time: 20 minutes
- Cook Time: 0 minutes
- Category: Dessert
- Method: No-Bake
- Cuisine: Japanese-Italian Fusion
Why You’ll Love This Recipe
This recipe offers the luxurious texture of traditional tiramisu with a unique flavor profile. Matcha provides a gentle earthiness that pairs beautifully with the smooth mascarpone mixture.
It is a no-bake dessert, making preparation simple and stress-free. The layers come together quickly, and the refrigerator does most of the work. It can also be prepared a day in advance, which makes it perfect for entertaining.
If you appreciate desserts that are not overly sweet and enjoy the nuanced taste of green tea, this Matcha Tiramisu will quickly become a favorite.
Ingredients
(Tip: You can find the complete list of ingredients and their measurements in the recipe card below.)
Ladyfinger biscuits
High-quality matcha powder
Hot water
Mascarpone cheese
Heavy cream
Granulated sugar
Egg yolks
Vanilla extract
Salt
Additional matcha powder for dusting
Directions
Begin by preparing the matcha mixture. In a small bowl, whisk matcha powder with hot water until smooth and free of lumps. Allow it to cool slightly.
In a mixing bowl, whisk egg yolks and sugar together until pale and slightly thickened. Add mascarpone cheese and vanilla extract, mixing until smooth.
In a separate bowl, whip the heavy cream until soft peaks form. Gently fold the whipped cream into the mascarpone mixture until fully combined and light in texture.
Quickly dip each ladyfinger into the cooled matcha mixture, ensuring they are moistened but not soggy. Arrange a layer of dipped ladyfingers in the bottom of a serving dish.
Spread half of the mascarpone cream evenly over the ladyfingers. Repeat with another layer of dipped ladyfingers and the remaining cream. Smooth the top.
Cover and refrigerate for at least 4 hours, preferably overnight, to allow the flavors to meld and the texture to set.
Before serving, dust the top generously with matcha powder.
Equipment needed :
Must-Have Tools to Get Rolling
Here’s what you’ll want to have on hand:
Silicone Spatula – Durable, heat-resistant silicone spatula perfect for mixing, scraping, and spreading. Gentle on non-stick cookware and easy to clean.
Large pot – You’ll need this to boil the whole cabbage head and soften the leaves.
large bowl –Spacious, durable large bowl ideal for mixing, serving, or food preparation. Made from sturdy material and easy to clean.
Sharp knife – For coring the cabbage and slicing out the thick stem in each leaf. A paring knife works best.
Mixing bowl – A big bowl makes it easier to combine your meat and rice filling evenly.
Cutting board – For prepping cabbage leaves and rolling them like a pro.
Full-Size Blender – is a powerful kitchen appliance for making smoothies, soups, and sauces in large batches.
3-in-1 Air Fryer – This versatile 3-in-1 air fryer offers Air Fry for healthier meals with less oil, Bake for bakery-quality desserts and treats, and Reheat to bring leftovers back to life with crispy, flavorful results
Servings and timing
This recipe serves 6–8 people.
Preparation time: 20 minutes
Chilling time: 4 hours minimum
Total time: About 4 hours 20 minutes
Storage/reheating
Store Matcha Tiramisu covered in the refrigerator for up to 3 days. It should always be kept chilled due to the dairy and egg content. This dessert is not suitable for reheating. For best flavor and texture, consume within two days.
Variations and Customizations
Matcha Tiramisu is flexible and can be adapted to suit different tastes. For a stronger green tea flavor, increase the amount of matcha in both the soaking liquid and the final dusting. I once added a small amount of white chocolate to the mascarpone mixture for extra sweetness, and it balanced the earthy matcha beautifully.
If you prefer to avoid raw egg yolks, you may gently cook them over a double boiler with sugar until slightly thickened before mixing with mascarpone. Alternatively, egg-free versions can be made by simply combining mascarpone with whipped cream and sugar.
For added texture, consider incorporating a thin layer of sweetened red bean paste between layers for a subtle Japanese-inspired touch. You may also serve it in individual glasses for an elegant presentation.
For a lighter version, substitute part of the mascarpone with cream cheese or Greek yogurt, though the flavor will be slightly different.
Nutrition and Dietary Info
Approximate values per serving (based on 8 servings):
| Nutrient | Amount per Serving |
|---|---|
| Calories | 410 kcal |
| Protein | 6 g |
| Carbohydrates | 34 g |
| Fat | 28 g |
| Saturated Fat | 16 g |
| Fiber | 1 g |
| Sugar | 22 g |
| Sodium | 120 mg |
Nutritional values may vary depending on ingredient brands and portion size.
FAQs
Can I make Matcha Tiramisu without eggs?
Yes, you can omit the egg yolks and rely on mascarpone and whipped cream for structure.
What type of matcha should I use?
Use high-quality culinary or ceremonial-grade matcha for the best flavor and color.
How long should it chill?
At least 4 hours, though overnight chilling provides the best texture and flavor.
Can I freeze Matcha Tiramisu?
Freezing is not recommended, as it may affect texture once thawed.
Why is my tiramisu runny?
Insufficient chilling time or over-soaked ladyfingers can cause excess moisture.
Can I use cream cheese instead of mascarpone?
Yes, but the flavor will be tangier and slightly less rich.
Conclusion
Matcha Tiramisu offers a sophisticated twist on a beloved classic. Its creamy layers, delicate green tea flavor, and elegant presentation make it a memorable dessert for any occasion. Simple to prepare yet impressive to serve, this no-bake treat brings together tradition and innovation in the most delicious way.
Hungry for more? Visit our website for full recipes and follow us on Pinterest for daily foodie inspo you’ll love to pin!