Lemon Bars are a classic dessert that perfectly balances sweet and tart flavors. With a buttery, crumbly crust and a tangy lemon filling, these bars are both refreshing and indulgent. They’re easy to make and always a crowd-pleaser, whether you’re serving them at a family gathering, bringing them to a potluck, or just enjoying a sweet treat at home. I tried adding a little extra lemon zest for an extra burst of citrus flavor, and it made these bars even more vibrant. Light, refreshing, and just the right amount of sweetness, Lemon Bars are the perfect dessert to brighten up any day.
Why You’ll Love This Recipe
Lemon Bars are a refreshing and light dessert that’s perfect for any occasion. The combination of a buttery, shortbread-like crust and a tangy lemon filling creates a mouthwatering contrast of flavors and textures. The bars are simple to make, yet elegant enough to impress guests. They’re also incredibly versatile, ideal for spring and summer gatherings but enjoyable year-round. The zesty lemon flavor paired with the sweet dusting of powdered sugar makes these bars a delightful treat that will leave everyone coming back for more.
Print
Lemon Bars: A Zesty and Refreshing Treat
- Total Time: 50 minutes
- Yield: 16 servings
- Diet: Vegetarian
Description
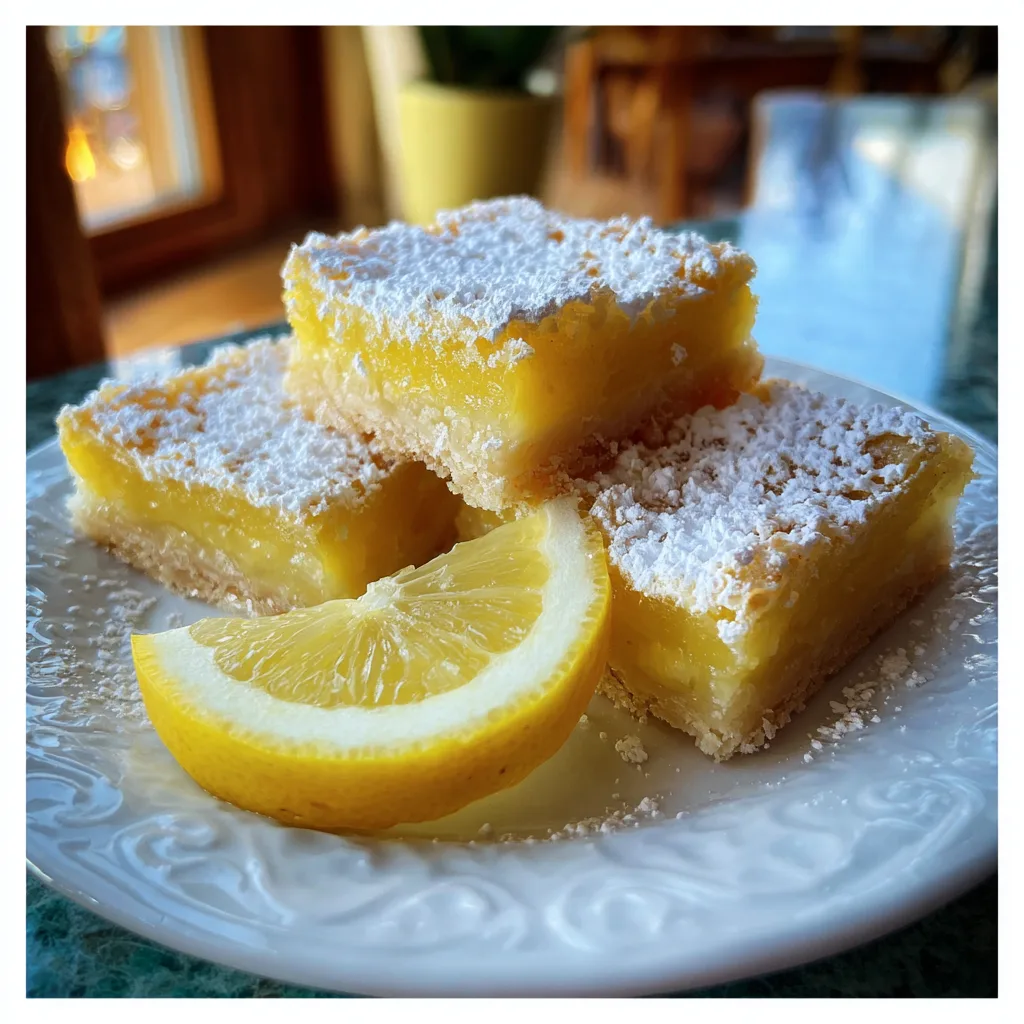
Lemon Bars are a delightful dessert with a buttery, crumbly crust and a tangy, sweet lemon filling. Perfectly balanced between tart and sweet, they make for a refreshing treat that’s easy to make and always a crowd-pleaser.
Ingredients
- 1 1/2 cups all-purpose flour
- 1/2 cup powdered sugar (for crust)
- 1/2 teaspoon salt
- 1/2 cup unsalted butter (cold and cubed)
- 2 large eggs
- 1 cup granulated sugar
- 2 tablespoons all-purpose flour (for filling)
- 1/2 teaspoon baking powder
- 1/4 teaspoon salt
- 1/2 cup fresh lemon juice (about 2–3 lemons)
- 1 tablespoon lemon zest
- Powdered sugar (for dusting)
Instructions
- Preheat your oven to 350°F (175°C). Grease and line an 8×8-inch baking dish with parchment paper or lightly grease the dish.
- For the crust, whisk together 1 1/2 cups flour, 1/2 cup powdered sugar, and 1/2 teaspoon salt in a medium bowl.
- Cut in the cold butter with a pastry cutter or your fingers until the mixture resembles coarse crumbs.
- Press the crust mixture into the bottom of the prepared baking dish and bake for 15-18 minutes, until the crust is golden and set.
- While the crust is baking, prepare the filling. In a separate bowl, whisk together the eggs, granulated sugar, 2 tablespoons of flour, baking powder, and 1/4 teaspoon salt until smooth.
- Stir in the lemon juice and lemon zest until well combined.
- Pour the lemon filling over the hot, baked crust, spreading evenly.
- Bake for an additional 18-20 minutes, or until the filling is set and lightly golden around the edges. A toothpick inserted should come out clean.
- Let the bars cool completely in the pan on a wire rack. Once cooled, dust the top with powdered sugar.
- Cut into squares and serve. Enjoy your refreshing lemon bars!
Notes
- If you prefer a more intense lemon flavor, you can add extra lemon zest to the filling.
- For a slightly different twist, you can substitute part of the lemon juice with lime juice for a lemon-lime bar.
- Make sure the crust is golden before adding the filling for the best texture.
- These bars can be stored in an airtight container in the fridge for up to 4 days.
- Prep Time: 15 minutes
- Cook Time: 35 minutes
- Category: Dessert
- Method: Baked
- Cuisine: American
Ingredients
(Tip: You can find the complete list of ingredients and their measurements in the recipe card below.)
Butter: The butter in the crust provides a rich, melt-in-your-mouth texture. It adds a depth of flavor to the crust, making it slightly crisp and deliciously buttery. For best results, use unsalted butter.
All-purpose flour: Flour is the base for the crust, giving it structure and a tender texture. The flour helps form the crumbly, shortbread-like crust that complements the tangy lemon filling.
Granulated sugar: Sugar sweetens the crust and adds to the overall flavor of the bars. It also contributes to the delicate, light texture of the shortbread crust.
Eggs: Eggs are essential for binding the lemon filling together, creating a smooth, custard-like texture. They help set the filling and give it a rich, velvety consistency.
Fresh lemon juice: The star of the filling, fresh lemon juice provides the tart, citrusy flavor that makes Lemon Bars so refreshing. Fresh lemon juice is key for a vibrant flavor, so avoid using bottled lemon juice.
Lemon zest: Lemon zest intensifies the lemon flavor, adding a fragrant and aromatic citrus note to the filling. It enhances the freshness of the bars and gives them a more complex flavor.
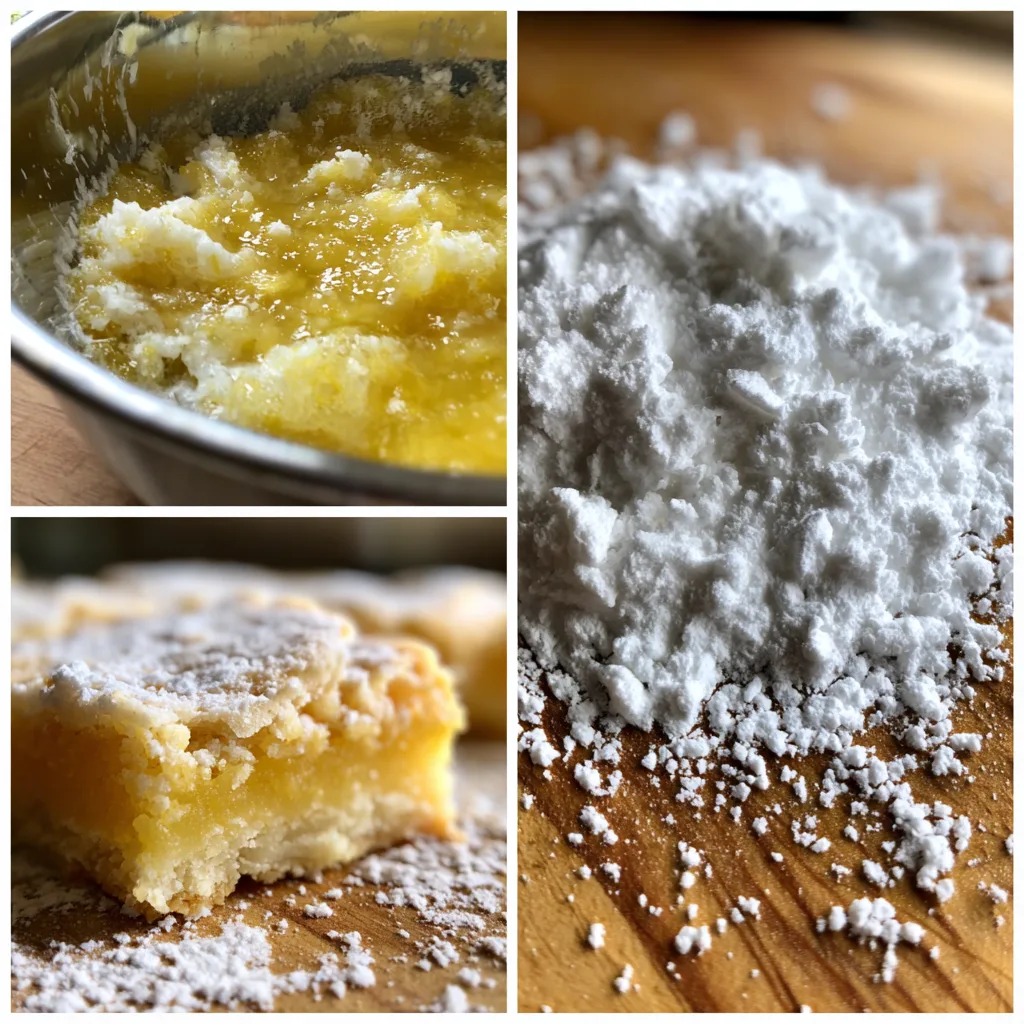
Powdered sugar: Powdered sugar is used to sweeten the filling without making it too gritty. It also provides a smooth, velvety texture. After baking, a light dusting of powdered sugar on top adds a beautiful finishing touch.
Baking powder: A small amount of baking powder helps the lemon filling set and rise slightly while maintaining a smooth, creamy texture.
Salt: A pinch of salt enhances the flavor of the lemon bars, balancing the sweetness and tartness and rounding out the overall taste.
Directions
- Preheat your oven to 350°F (175°C). Grease an 8×8-inch baking pan or line it with parchment paper for easy removal of the bars.
- Start by making the crust. In a medium-sized mixing bowl, combine the flour, sugar, and a pinch of salt. Cut in the butter using a pastry cutter or your fingers until the mixture resembles coarse crumbs. Press the mixture into the bottom of the prepared baking pan, creating an even layer. Bake for 18-20 minutes, or until the crust is lightly golden.
- While the crust is baking, prepare the lemon filling. In a separate bowl, whisk together the eggs, granulated sugar, lemon juice, lemon zest, and baking powder. Stir until smooth and well combined.
- Once the crust has finished baking, remove it from the oven and pour the lemon filling over the warm crust. Return the pan to the oven and bake for an additional 20-25 minutes, or until the filling is set and slightly golden around the edges. The center should be firm but slightly wobbly.
- Let the lemon bars cool completely in the pan on a wire rack. Once cool, refrigerate them for at least 2 hours to allow the filling to fully set.
- Once chilled, dust the top of the bars with powdered sugar and cut them into squares. Serve and enjoy!
Equipment Needed
Here’s what you’ll want to have on hand:
Silicone Spatula – Durable, heat-resistant silicone spatula perfect for mixing, scraping, and spreading. Gentle on non-stick cookware and easy to clean.
Large pot – You’ll need this to boil the whole cabbage head and soften the leaves.
large bowl –Spacious, durable large bowl ideal for mixing, serving, or food preparation. Made from sturdy material and easy to clean.
Sharp knife – For coring the cabbage and slicing out the thick stem in each leaf. A paring knife works best.
Mixing bowl – A big bowl makes it easier to combine your meat and rice filling evenly.
Cutting board – For prepping cabbage leaves and rolling them like a pro.
Full-Size Blender – is a powerful kitchen appliance for making smoothies, soups, and sauces in large batches.
3-in-1 Air Fryer – This versatile 3-in-1 air fryer offers Air Fry for healthier meals with less oil, Bake for bakery-quality desserts and treats, and Reheat to bring leftovers back to life with crispy, flavorful results
Must-Have Tools to Get Rolling
Here’s what you’ll want to have on hand:
- A sturdy 8×8-inch baking pan is key to baking the bars evenly.
- A whisk will help you blend the ingredients for the lemon filling smoothly.
- A pastry cutter or your hands work well to mix the butter into the dry ingredients for the crust.
Servings and Timing
This recipe makes approximately 12-16 bars, depending on how you cut them. The total prep time is about 20 minutes, with a baking time of 40-45 minutes, and the bars should be chilled for at least 2 hours before serving.
Storage/Reheating
Store leftover Lemon Bars in an airtight container in the refrigerator for up to 3-4 days. They can also be frozen for up to 3 months. To freeze, wrap them tightly in plastic wrap and place them in a freezer bag. Thaw them in the refrigerator before serving.
Variations and Customizations
Lemon Bars are a versatile treat that can be customized to suit your preferences:
- Add berries: For a fruity twist, you can add fresh berries like raspberries or blueberries to the top of the bars after they bake. The tartness of the berries pairs perfectly with the lemon flavor.
- Lime version: Substitute the lemon juice with fresh lime juice and zest for a citrusy variation. You could even combine lemon and lime for a unique blend of flavors.
- Ginger crust: Add a little ground ginger to the crust for a subtle, spicy kick that complements the citrus filling.
- Meringue topping: For a more indulgent version, top the bars with a light meringue before baking. It adds a sweet, airy contrast to the tangy filling.
FAQs
Can I use bottled lemon juice instead of fresh lemons?
While fresh lemon juice provides the best flavor, bottled lemon juice can be used in a pinch. However, it may not offer the same vibrant, fresh taste.
How do I know when the bars are done?
The filling should be set and slightly golden around the edges. It will be firm but still a little wobbly in the center. You can also test with a toothpick—if it comes out clean, the bars are done.
Can I make these bars ahead of time?
Yes, Lemon Bars are perfect for making ahead. You can prepare them the day before and store them in the fridge overnight. They will taste even better after the flavors have had time to meld.
Can I make these bars gluten-free?
Yes, you can substitute the all-purpose flour with a gluten-free flour blend to make the bars gluten-free. Be sure to use a blend that works well for baking.
Can I use a larger baking pan?
If you use a larger pan (such as a 9×13-inch pan), the bars will be thinner. You may need to adjust the baking time slightly to ensure the filling sets properly.
Can I make these bars without eggs?
Eggs are necessary for the texture of the filling, but you can try an egg substitute like flax eggs or a commercial egg replacer. However, the texture may not be exactly the same.
How should I store leftover Lemon Bars?
Store them in an airtight container in the refrigerator. They’ll stay fresh for about 3-4 days.
Can I freeze Lemon Bars?
Yes, Lemon Bars freeze well. Wrap them tightly in plastic wrap and place them in an airtight container or freezer bag. Thaw them in the refrigerator when ready to serve.
Can I add a meringue topping?
Yes, you can top the bars with meringue before baking. Simply whip egg whites with sugar and spread the meringue over the lemon filling, then bake as directed.
How do I prevent the crust from becoming soggy?
Make sure to bake the crust until it’s golden and firm before adding the filling. You can also bake the crust for a few extra minutes if it looks too soft.
Conclusion
Lemon Bars are a timeless treat that perfectly combines the tanginess of lemon with the richness of a buttery crust. With their refreshing flavor and light, delicate texture, they make the perfect dessert for any occasion. Whether you’re looking for a sweet treat for a family gathering or a bright dessert to finish a meal, these bars will always impress. Easy to make, customizable, and delicious, Lemon Bars are sure to become a staple in your baking repertoire!
Hungry for more? Visit our website for full recipes and follow us on Pinterest for daily foodie inspo you’ll love to pin!