Introduction
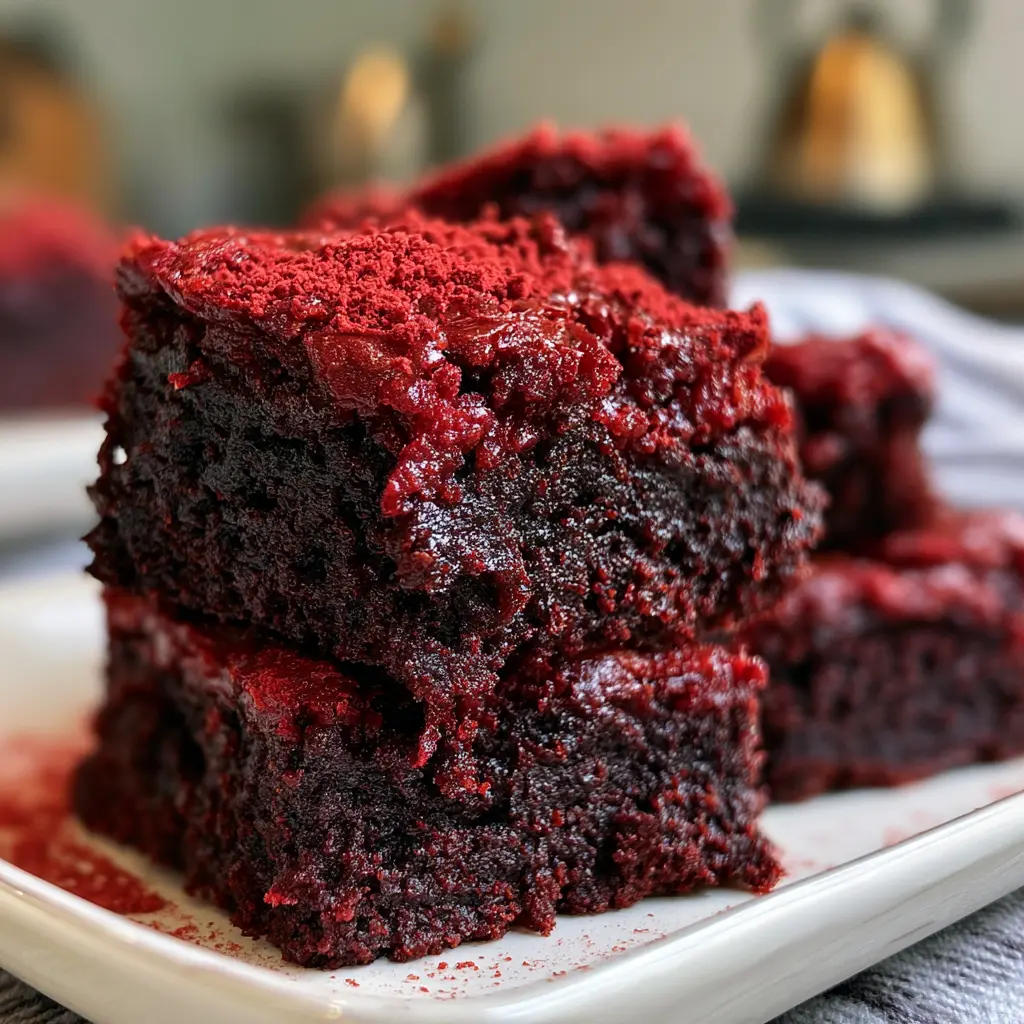
If you love the classic flavor of red velvet cake but crave the rich, chewy texture of brownies, these Red Velvet Brownies are the perfect dessert. They combine the signature cocoa flavor and vibrant red color of traditional red velvet with the dense, fudgy consistency of a homemade brownie. Finished with a luscious cream cheese frosting or enjoyed on their own, these brownies are elegant enough for celebrations yet simple enough to make whenever a sweet craving strikes.
The first time I baked these brownies was for a holiday dessert table, and they quickly became everyone’s favorite. Their beautiful red color made them stand out, while the soft, fudgy texture kept people coming back for another piece. Since then, I have made them for birthdays, Valentine’s Day, Christmas, and weekend baking sessions. They are easy to prepare, look impressive, and deliver the perfect balance of chocolate richness with a subtle hint of vanilla in every bite.
Print
Red Velvet Brownies – Rich, Fudgy, and Irresistibly Decadent
- Total Time: 50 minutes
- Yield: 16 brownies
- Diet: Vegetarian
Description
Red Velvet Brownies are rich, fudgy bars with the signature flavor and vibrant color of classic red velvet cake. Topped with a luscious cream cheese frosting, these brownies are soft, chewy, and perfect for holidays, Valentine’s Day, or any special occasion.
Ingredients
- 1/2 cup unsalted butter, melted
- 1 cup granulated sugar
- 2 large eggs
- 1 teaspoon vanilla extract
- 1 tablespoon red food coloring
- 1 tablespoon unsweetened cocoa powder
- 1 cup all-purpose flour
- 1/4 teaspoon salt
- 1 teaspoon white vinegar
- For the Cream Cheese Frosting:
- 8 oz cream cheese, softened
- 1/4 cup unsalted butter, softened
- 2 cups powdered sugar
- 1 teaspoon vanilla extract
Instructions
- Preheat oven to 350°F (175°C). Line an 8×8-inch baking pan with parchment paper and lightly grease it.
- In a large bowl, whisk together the melted butter and granulated sugar until smooth.
- Beat in the eggs one at a time, then add the vanilla extract, red food coloring, cocoa powder, and vinegar.
- Fold in the flour and salt until just combined. Do not overmix.
- Spread the batter evenly into the prepared pan.
- Bake for 25-30 minutes, or until a toothpick inserted near the center comes out with a few moist crumbs.
- Allow the brownies to cool completely in the pan.
- For the frosting, beat the cream cheese and butter until smooth and creamy.
- Add the powdered sugar and vanilla extract, beating until light and fluffy.
- Spread the frosting evenly over the cooled brownies.
- Chill for 20-30 minutes before slicing into squares.
Notes
- Do not overbake to maintain a fudgy texture.
- Gel food coloring provides a more vibrant red color than liquid food coloring.
- Decorate with red velvet crumbs or white chocolate shavings for an elegant finish.
- For cleaner slices, refrigerate before cutting and wipe the knife between cuts.
- Store covered in the refrigerator for up to 5 days.
- Prep Time: 20 minutes
- Cook Time: 30 minutes
- Category: Dessert
- Method: Baking
- Cuisine: American
Why You’ll Love This Recipe
- Rich, fudgy brownie texture.
- Beautiful vibrant red velvet color.
- Easy to make with simple ingredients.
- Perfect for holidays and special occasions.
- Delicious with or without cream cheese frosting.
- Soft, chewy, and moist.
- Beginner-friendly recipe.
- Great for parties, bake sales, and gifts.
- Easy to customize with mix-ins and toppings.
- A guaranteed crowd favorite.
Ingredients
Tip: You can find the complete list of ingredients and their measurements in the recipe card below.
All-Purpose Flour provides the structure needed for perfectly chewy brownies. Measuring it accurately helps maintain a soft and fudgy texture without making the brownies dense.
Unsweetened Cocoa Powder gives the brownies their signature chocolate flavor. A small amount creates the classic red velvet taste while allowing the vibrant red color to shine.
Granulated Sugar sweetens the batter and contributes to the glossy, crackly top that makes homemade brownies so appealing.
Unsalted Butter adds richness and creates the moist, tender texture that makes every bite melt in your mouth. Melted butter blends smoothly into the batter and enhances the cocoa flavor.
Eggs provide structure while keeping the brownies soft and chewy. Room-temperature eggs mix more evenly into the batter for consistent results.
Vanilla Extract enhances both the chocolate and buttery flavors while adding the classic aroma associated with red velvet desserts.
Red Food Coloring creates the iconic vibrant red appearance. Gel food coloring is often preferred because it delivers a deeper color without adding extra liquid to the batter.
White Vinegar reacts with the cocoa powder and helps create the subtle tang that makes red velvet desserts unique. Only a small amount is needed.
Salt balances the sweetness and intensifies the chocolate flavor.
Cream Cheese Frosting is optional but highly recommended. Its smooth, tangy sweetness pairs beautifully with the rich brownie base and transforms the dessert into a bakery-style treat.
Each ingredient contributes to brownies that are moist, flavorful, and perfectly balanced with every bite.
How to Make
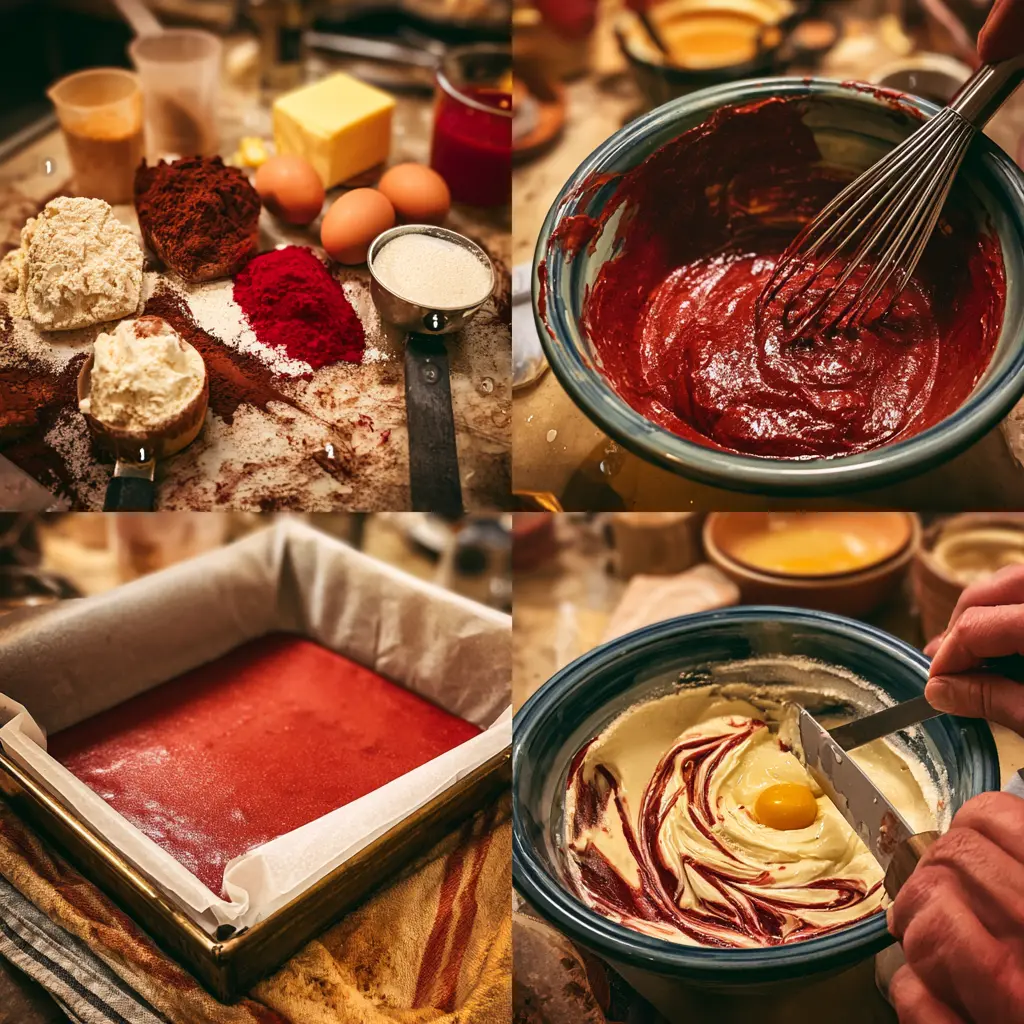
Preheat your oven to 350°F (175°C). Line an 8-inch square baking pan with parchment paper or lightly grease it for easy removal after baking.
In a medium bowl, whisk together the flour, cocoa powder, and salt until evenly combined. Set the dry ingredients aside.
In a separate large bowl, whisk the melted butter and granulated sugar until smooth. Add the eggs one at a time, mixing well after each addition. Stir in the vanilla extract, red food coloring, and vinegar until fully incorporated.
Gradually fold the dry ingredients into the wet ingredients using a spatula. Mix only until no streaks of flour remain. Avoid overmixing, as this can produce tougher brownies.
Pour the batter into the prepared baking pan and spread it evenly with a spatula. Gently tap the pan on the counter to remove any large air bubbles.
Bake for approximately 28 to 32 minutes, or until the edges are set and a toothpick inserted near the center comes out with a few moist crumbs. Be careful not to overbake if you want a fudgy texture.
Allow the brownies to cool completely in the pan before removing them. If using cream cheese frosting, spread it evenly over the cooled brownies and smooth the surface with an offset spatula.
Slice into neat squares using a sharp knife wiped clean between each cut. Serve immediately or refrigerate briefly if you prefer firmer brownies.
Common Mistakes to Avoid
- Overmixing the batter.
- Overbaking the brownies.
- Using too much cocoa powder.
- Skipping parchment paper.
- Adding frosting before the brownies cool.
- Using cold eggs directly from the refrigerator.
- Measuring flour inaccurately.
Equipment Needed
Here’s what you’ll want to have on hand:
Silicone Spatula – Durable, heat-resistant silicone spatula perfect for mixing, scraping, and spreading. Gentle on non-stick cookware and easy to clean.
Large pot – You’ll need this to boil the whole cabbage head and soften the leaves.
large bowl –Spacious, durable large bowl ideal for mixing, serving, or food preparation. Made from sturdy material and easy to clean.
Sharp knife – For coring the cabbage and slicing out the thick stem in each leaf. A paring knife works best.
Mixing bowl – A big bowl makes it easier to combine your meat and rice filling evenly.
Cutting board – For prepping cabbage leaves and rolling them like a pro.
Full-Size Blender – is a powerful kitchen appliance for making smoothies, soups, and sauces in large batches.
3-in-1 Air Fryer – This versatile 3-in-1 air fryer offers Air Fry for healthier meals with less oil, Bake for bakery-quality desserts and treats, and Reheat to bring leftovers back to life with crispy, flavorful results
Servings and Timing
- Servings: 16
- Prep Time: 15 minutes
- Cook Time: 30 minutes
- Total Time: 45 minutes
Storage/Reheating
Store the brownies in an airtight container at room temperature for up to three days or refrigerate for up to one week if frosted. They can also be frozen for up to three months. Thaw overnight in the refrigerator or at room temperature before serving. For unfrosted brownies, a few seconds in the microwave restores their soft, fudgy texture.
Variations and Customizations
These Red Velvet Brownies are incredibly versatile, allowing you to create a variety of delicious versions. For the classic bakery-style finish, spread a thick layer of homemade cream cheese frosting over the cooled brownies and garnish with red velvet crumbs.
White chocolate chips are a wonderful addition to the batter. Their creamy sweetness perfectly complements the mild cocoa flavor while adding pockets of melted chocolate throughout the brownies.
If you enjoy extra chocolate, stir in semi-sweet or dark chocolate chips before baking for an even richer dessert. Chopped pecans or walnuts also provide a satisfying crunch and pair beautifully with the fudgy texture.
For festive occasions, decorate the frosted brownies with heart-shaped sprinkles for Valentine’s Day, colorful sprinkles for birthdays, or holiday-themed decorations during Christmas.
A drizzle of melted white chocolate creates an elegant bakery-style appearance while adding another layer of sweetness. You can even swirl the white chocolate into the cream cheese frosting for a decorative finish.
Coffee lovers can add a teaspoon of espresso powder to the batter. Although it will not make the brownies taste like coffee, it intensifies the chocolate flavor beautifully.
If you prefer bite-sized treats, bake the batter in a mini muffin pan for red velvet brownie bites that are perfect for dessert platters and parties.
For a more indulgent dessert, serve warm brownies with vanilla ice cream, whipped cream, or fresh berries. The contrast between warm brownies and cold ice cream is especially delicious.
With so many creative possibilities, these brownies can easily become your go-to dessert for every celebration.
Nutrition and Dietary Info
| Nutrient | Per Serving |
|---|---|
| Calories | 295 |
| Protein | 3 g |
| Carbohydrates | 34 g |
| Fat | 16 g |
| Saturated Fat | 9 g |
| Fiber | 1 g |
| Sugar | 24 g |
| Sodium | 160 mg |
Nutrition values are approximate and may vary depending on the ingredients used.
Expert Tips & Customizations
Use Gel Food Coloring: It produces a vibrant red color without thinning the batter.
Don’t Overmix: Gentle mixing keeps the brownies tender and fudgy.
Measure Flour Carefully: Too much flour can create dry brownies.
Bake Just Until Done: Slightly underbaked brownies become perfectly fudgy as they cool.
Cool Before Frosting: This prevents the frosting from melting.
Use Quality Cocoa Powder: Better cocoa creates richer flavor.
Line the Pan: Parchment paper makes removing the brownies simple and clean.
Decorate Creatively: Add white chocolate curls, red velvet crumbs, or festive sprinkles for an eye-catching finish.
FAQs
Can I make these brownies ahead of time?
Yes. They stay fresh for several days and can be baked a day in advance.
Can I freeze Red Velvet Brownies?
Absolutely. Freeze them in an airtight container for up to three months.
Do I have to use cream cheese frosting?
No. The brownies are rich and delicious even without frosting.
Can I use natural food coloring?
Yes, although the final color may be less vibrant than when using gel food coloring.
How do I know when they’re done?
A toothpick inserted into the center should come out with a few moist crumbs but no wet batter.
Can I add chocolate chips?
Yes. White, milk, dark, or semi-sweet chocolate chips all make excellent additions.
Conclusion
These Red Velvet Brownies combine everything people love about classic red velvet cake with the irresistible chewiness of homemade brownies. Rich, moist, and beautifully vibrant, they are perfect for holidays, birthdays, bake sales, or simply treating yourself to something special. Whether served plain or topped with creamy frosting, these brownies are guaranteed to impress with both their appearance and incredible flavor, making them a recipe you’ll return to again and again.
Hungry for more? Visit our website for full recipes and follow us on Pinterest for daily foodie inspo you’ll love to pin!