Introduction
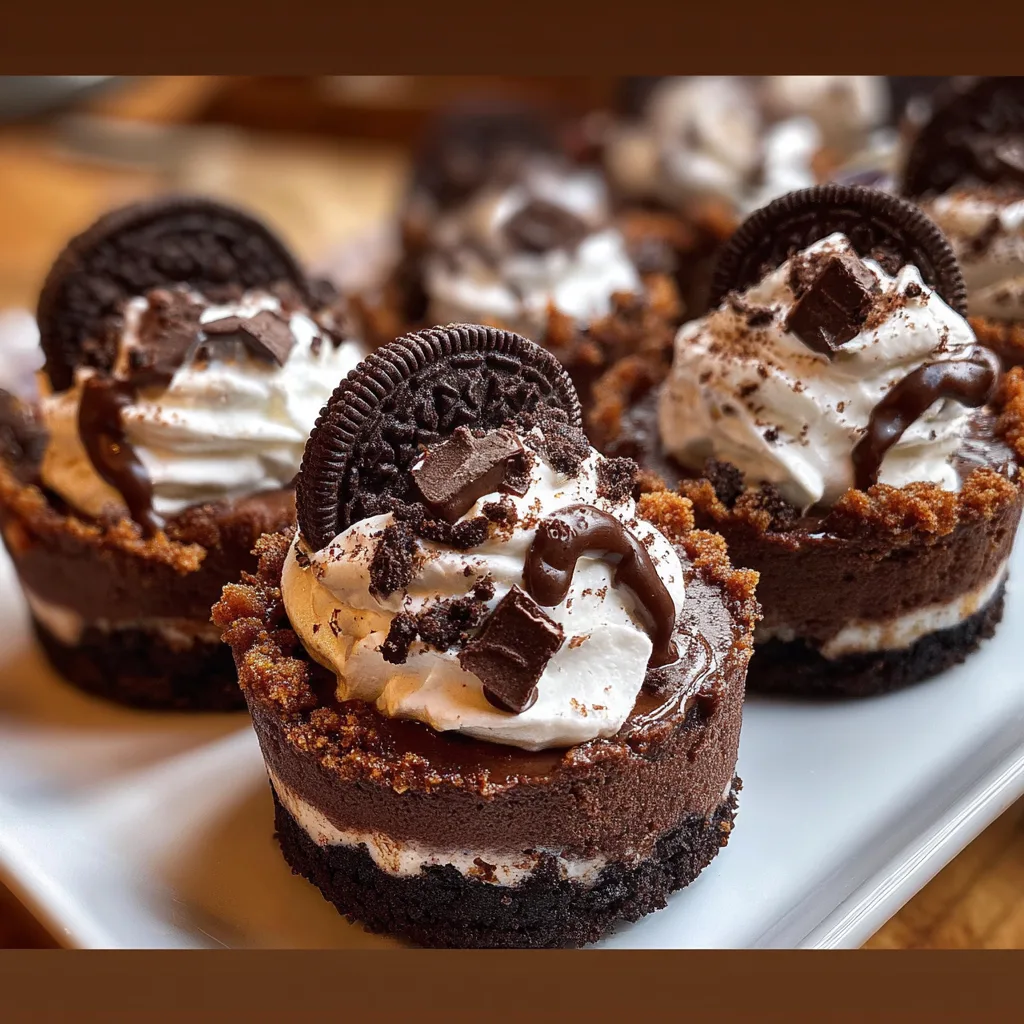
Oreo Dirt Cups are one of those nostalgic desserts that bring both fun and flavor together in the best way. With layers of crushed Oreos, creamy chocolate pudding, and a smooth whipped topping, these individual cups are as delicious as they are playful. The first time I made them, I added a few gummy worms on top, and they instantly became a hit—especially with kids.
What makes this recipe so special is how easy and customizable it is. There is no baking required, and it comes together in minutes, making it perfect for parties, family gatherings, or quick sweet cravings. The texture is what really stands out—creamy, crunchy, and perfectly balanced. Whether you are making them for a themed event or just for fun, Oreo Dirt Cups are always a crowd-pleaser.
Print
Oreo Dirt Cups: Fun, Creamy, and Irresistibly Chocolatey Treats
- Total Time: 1 hour 15 minutes
- Yield: 6 servings
- Diet: Vegetarian
Description
A fun and creamy no-bake dessert made with layers of crushed Oreo cookies and chocolate pudding, often topped with gummy worms for a playful treat.
Ingredients
- 2 cups crushed Oreo cookies
- 1 box (instant) chocolate pudding mix
- 2 cups cold milk
- 1 cup whipped topping (or whipped cream)
- 1/2 cup cream cheese, softened
- 1/4 cup powdered sugar
- Gummy worms or candies for decoration (optional)
Instructions
- Prepare chocolate pudding by whisking pudding mix with cold milk until thickened. Set aside.
- In a bowl, beat cream cheese and powdered sugar until smooth.
- Fold in whipped topping until creamy.
- Add the pudding to the cream mixture and mix well.
- In serving cups, layer crushed Oreos and pudding mixture.
- Repeat layers, ending with crushed Oreos on top.
- Decorate with gummy worms if desired.
- Refrigerate for at least 1 hour before serving.
Notes
- Chill for better texture and flavor.
- Use clear cups for a layered presentation.
- Can be made a day ahead.
- Add chocolate chips for extra richness.
- Prep Time: 15 minutes
- Cook Time: 0 minutes
- Category: Dessert
- Method: No-Bake
- Cuisine: American
Why You’ll Love This Recipe
These Oreo dirt cups are quick, no-bake, creamy, fun to make, and perfect for both kids and adults.
Ingredients
(Tip: You can find the complete list of ingredients and their measurements in the recipe card below.)
Oreo cookies create the “dirt” layer, adding a crunchy chocolate texture and rich flavor.
Chocolate pudding mix forms the creamy base, delivering a smooth and chocolatey taste.
Milk is used to prepare the pudding, giving it the right consistency.
Cream cheese adds richness and a slight tang, making the filling extra creamy.
Butter helps blend with the cream cheese for a smooth texture.
Powdered sugar sweetens the cream mixture without making it grainy.
Whipped topping adds lightness and creates a fluffy, airy texture.
Gummy worms (optional) provide a fun decorative touch, especially for themed desserts.
Directions
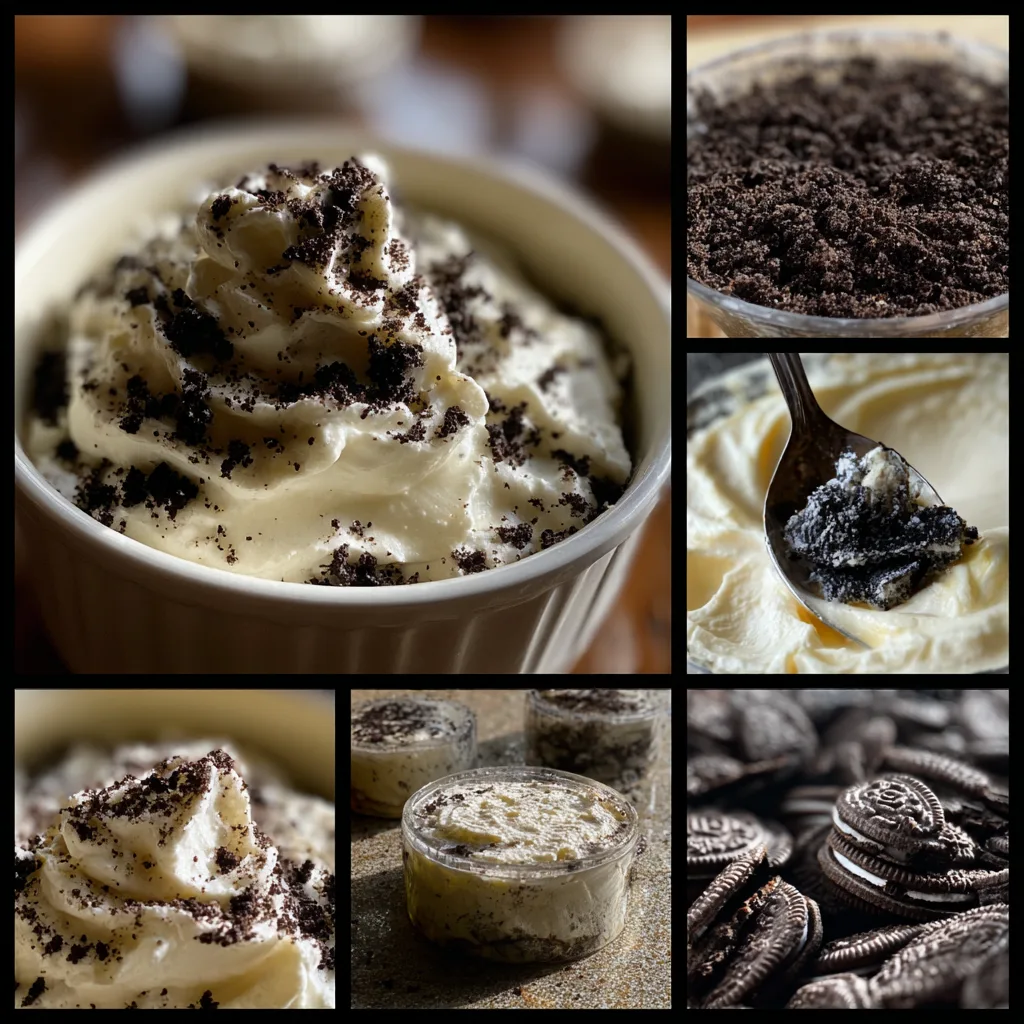
Start by crushing the Oreo cookies into fine crumbs, leaving a bit of texture for a realistic “dirt” look. Set aside.
In a bowl, prepare the chocolate pudding according to the package instructions using milk, then let it set slightly.
In another bowl, beat together the cream cheese, softened butter, and powdered sugar until smooth and creamy. Fold in the whipped topping gently to keep the mixture light.
Combine the cream mixture with the prepared pudding, stirring until fully blended and smooth.
To assemble, layer crushed Oreos at the bottom of serving cups, followed by a layer of the creamy pudding mixture. Repeat the layers until the cups are filled, finishing with a layer of Oreo crumbs on top.
Decorate with gummy worms if desired. Chill in the refrigerator for at least 1 hour before serving for the best texture.
Equipment needed : Must-Have Tools to Get Rolling
Here’s what you’ll want to have on hand:
Silicone Spatula – Durable, heat-resistant silicone spatula perfect for mixing, scraping, and spreading. Gentle on non-stick cookware and easy to clean.
Large pot – You’ll need this to boil the whole cabbage head and soften the leaves.
large bowl –Spacious, durable large bowl ideal for mixing, serving, or food preparation. Made from sturdy material and easy to clean.
Sharp knife – For coring the cabbage and slicing out the thick stem in each leaf. A paring knife works best.
Mixing bowl – A big bowl makes it easier to combine your meat and rice filling evenly.
Cutting board – For prepping cabbage leaves and rolling them like a pro.
Full-Size Blender – is a powerful kitchen appliance for making smoothies, soups, and sauces in large batches.
3-in-1 Air Fryer – This versatile 3-in-1 air fryer offers Air Fry for healthier meals with less oil, Bake for bakery-quality desserts and treats, and Reheat to bring leftovers back to life with crispy, flavorful results
Servings and timing
This recipe serves 6 to 8 cups, with a preparation time of 15 minutes and chilling time of 1 hour.
Storage/reheating
Store the cups in the refrigerator for up to 3 days, covered היט to maintain freshness, and serve chilled without reheating.
Variations and Customizations
Oreo Dirt Cups are incredibly fun to customize, making them perfect for different occasions. For a richer flavor, you can use chocolate mousse instead of pudding. I tried this once, and it made the dessert feel even more indulgent.
If you want to change the flavor profile, consider using vanilla pudding with golden Oreos for a lighter twist. This variation is just as delicious and visually unique.
For a more festive presentation, you can add layers of colored sprinkles or themed candies depending on the occasion. This makes them perfect for holidays or parties.
You can also add crushed peanut butter cups or chocolate chips between the layers for extra texture and flavor.
For a healthier option, use reduced-fat cream cheese and light whipped topping. It still delivers great taste with fewer calories.
Nutrition and Dietary Info
| Nutrient | Per Serving |
|---|---|
| Calories | 320 kcal |
| Protein | 4 g |
| Carbs | 40 g |
| Fat | 16 g |
| Saturated Fat | 8 g |
| Fiber | 1 g |
| Sugar | 25 g |
| Sodium | 220 mg |
Expert Tips & Customizations
Crush cookies with texture
Adds a more realistic “dirt” look.
Soften cream cheese היט
Ensures a smooth mixture.
Chill before serving
Improves texture and flavor.
Layer evenly
Creates a balanced bite.
Decorate last
Keeps toppings fresh and appealing.
FAQs
Can I make these ahead of time?
Yes, they can be made a day in advance and stored in the fridge.
Can I use homemade pudding?
Yes, homemade pudding works perfectly.
What can I use instead of whipped topping?
Fresh whipped cream is a great alternative.
Can I freeze Oreo dirt cups?
It is not recommended as the texture may change.
Are they kid-friendly?
Absolutely, they are fun and loved by kids.
Can I use different cookies?
Yes, any chocolate cookies can work as a substitute.
Conclusion
Oreo Dirt Cups are the perfect combination of fun and flavor. With their creamy layers, crunchy texture, and playful presentation, they are a dessert that brings joy to any occasion. Easy to make and endlessly customizable, this recipe is one you will come back to whenever you want a quick and delightful treat.
Hungry for more? Visit our website for full recipes and follow us on Pinterest for daily foodie inspo you’ll love to pin!