Why You’ll Love This Recipe
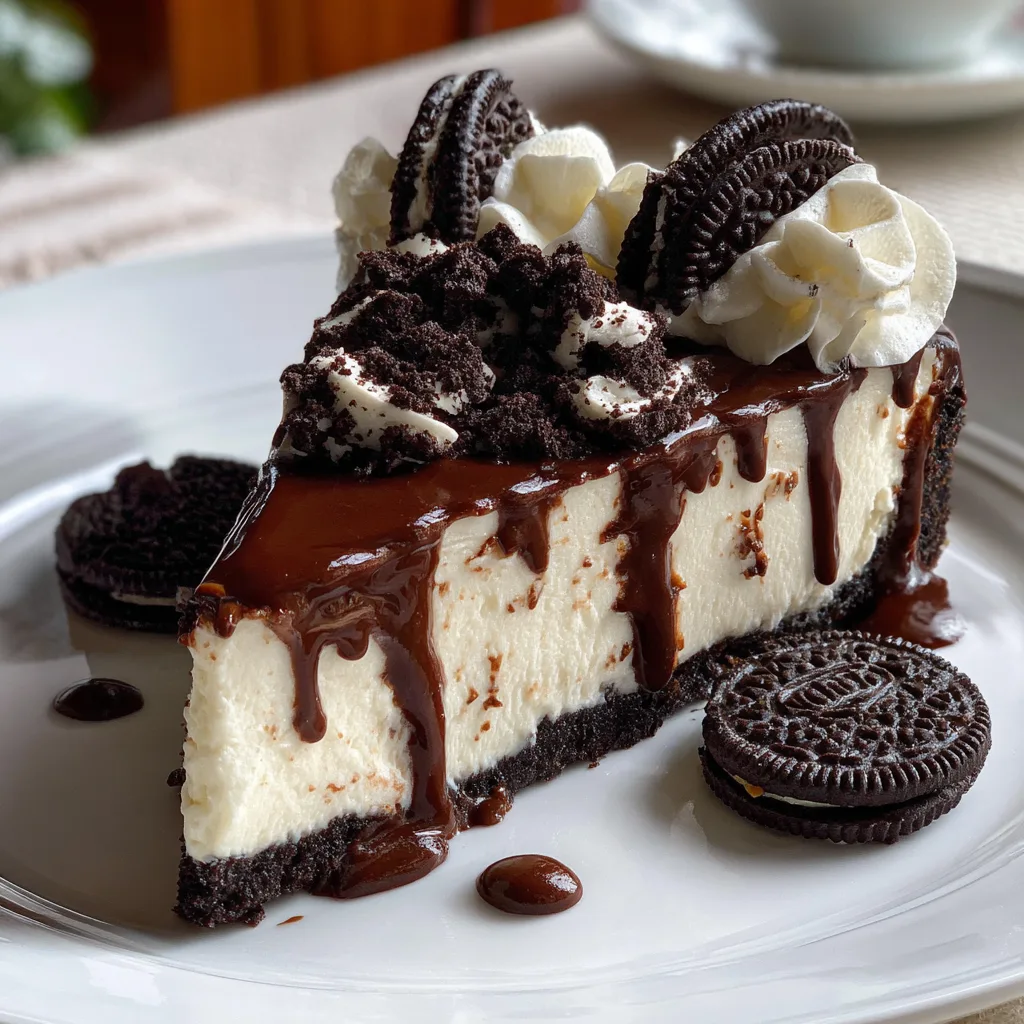
If you are craving a rich, creamy dessert without turning on your oven, this Oreo No-Bake Cheesecake is exactly what you need. It is smooth, indulgent, and packed with that classic cookies-and-cream flavor everyone loves. I personally tried this recipe on a warm afternoon when baking felt impossible, and it turned out beautifully set and incredibly satisfying.
What makes this cheesecake truly special is its simplicity. With just a handful of ingredients and minimal effort, you can create a dessert that looks impressive and tastes even better. The crunchy Oreo crust paired with the velvety cream cheese filling creates a perfect balance of texture and flavor.
Whether you are preparing it for a family gathering, a celebration, or just a sweet treat for yourself, this no-bake cheesecake is a guaranteed crowd-pleaser. Plus, it is beginner-friendly, so anyone can make it successfully.
Print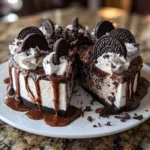
Irresistible Oreo No-Bake Cheesecake – Creamy, Easy & No Oven Needed
- Total Time: 4 hours 15 minutes
- Yield: 6 servings
- Diet: Vegetarian
Description
A rich and creamy Oreo no-bake cheesecake with a crunchy cookie crust and smooth chocolatey filling, perfect for an easy dessert.
Ingredients
- 24 Oreo cookies (crushed)
- 5 tablespoons melted butter
- 200g cream cheese, softened
- 1/2 cup powdered sugar
- 1 teaspoon vanilla extract
- 1 cup whipped cream
- 6 Oreo cookies, chopped (for filling)
Instructions
- Mix crushed Oreo cookies with melted butter until combined.
- Press the mixture into the bottom of a pan or cups to form the crust.
- In a bowl, beat cream cheese, powdered sugar, and vanilla until smooth.
- Fold in whipped cream gently.
- Stir in chopped Oreos.
- Spoon the filling over the crust and smooth the top.
- Refrigerate for at least 4 hours or until set.
- Garnish with extra Oreo crumbs before serving.
Notes
- Use full-fat cream cheese for best texture.
- Chill overnight for a firmer cheesecake.
- You can make individual cups for easy serving.
- Add chocolate drizzle for extra indulgence.
- Prep Time: 15 minutes
- Cook Time: 0 minutes
- Category: Dessert
- Method: No-Bake
- Cuisine: American
Ingredients
(Tip: You can find the complete list of ingredients and their measurements in the recipe card below.)
Oreo cookies form the base and flavor foundation of this cheesecake. They are used both for the crust and folded into the filling, giving that signature cookies-and-cream taste.
Unsalted butter helps bind the crushed Oreos together to create a firm, buttery crust that holds its shape once chilled.
Cream cheese is the star ingredient, providing the rich and creamy texture. Make sure it is softened to avoid lumps and achieve a smooth filling.
Powdered sugar adds sweetness while keeping the texture light and silky. It blends easily into the cream cheese without any graininess.
Vanilla extract enhances the overall flavor and adds a subtle warmth that complements the Oreo cookies beautifully.
Heavy whipping cream is essential for creating a light and airy texture. When whipped, it gives the cheesecake its fluffy and mousse-like consistency.
Extra crushed Oreos are folded into the filling for added crunch and visual appeal, making every bite more indulgent.
Directions
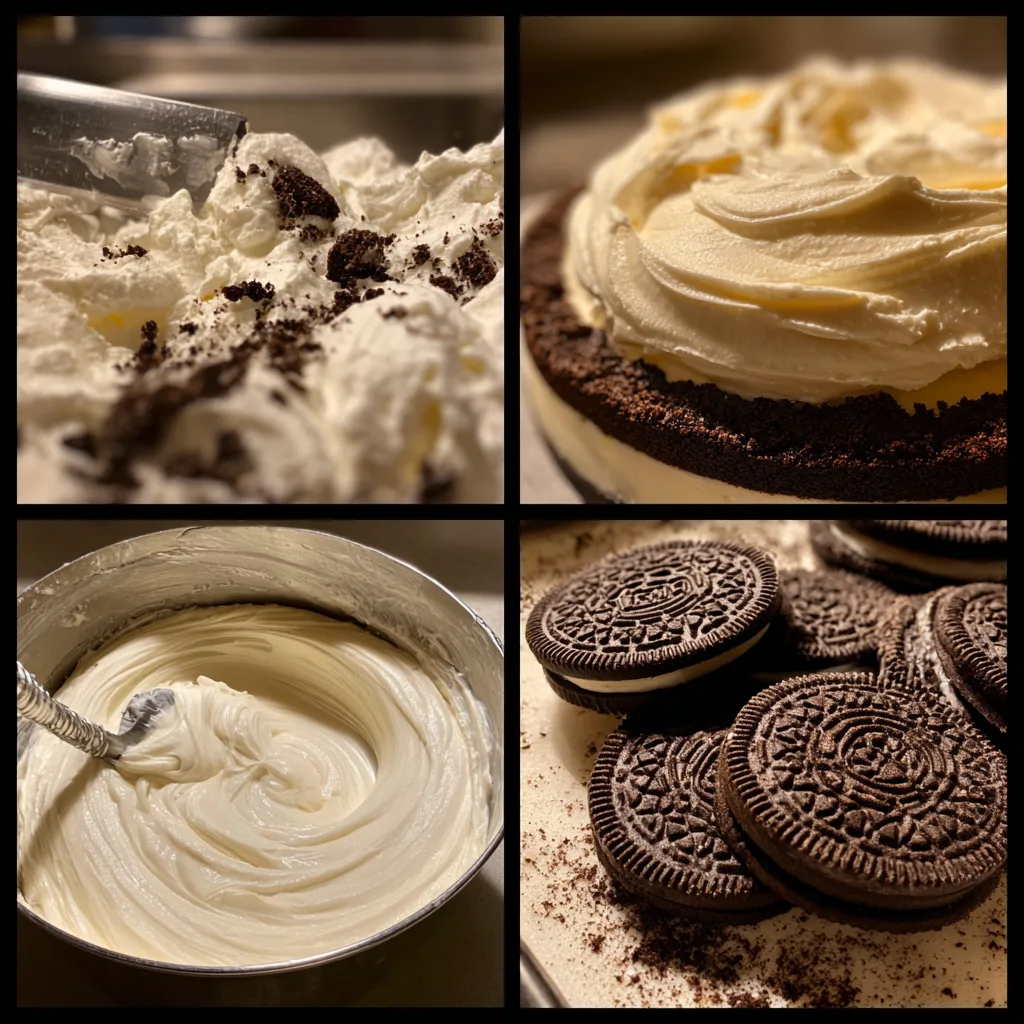
Start by preparing the crust. Crush the Oreo cookies into fine crumbs using a food processor or by placing them in a sealed bag and crushing them with a rolling pin. Mix the crumbs with melted butter until fully combined. Press the mixture firmly into the base of a springform pan, creating an even layer. Place it in the refrigerator to set while you prepare the filling.
In a large bowl, beat the softened cream cheese until smooth and creamy. Add powdered sugar and vanilla extract, then continue mixing until well incorporated.
In a separate bowl, whip the heavy cream until stiff peaks form. This step is crucial for achieving that light and airy texture. Gently fold the whipped cream into the cream cheese mixture, being careful not to deflate it.
Fold in the crushed Oreo pieces, distributing them evenly throughout the filling. Spoon the mixture over the chilled crust and smooth the top with a spatula.
Refrigerate the cheesecake for at least 6 hours, or preferably overnight, until fully set. Once ready, remove from the pan, slice, and serve chilled.
Equipment needed : Must-Have Tools to Get Rolling
Here’s what you’ll want to have on hand:
Silicone Spatula – Durable, heat-resistant silicone spatula perfect for mixing, scraping, and spreading. Gentle on non-stick cookware and easy to clean.
Large pot – You’ll need this to boil the whole cabbage head and soften the leaves.
large bowl –Spacious, durable large bowl ideal for mixing, serving, or food preparation. Made from sturdy material and easy to clean.
Sharp knife – For coring the cabbage and slicing out the thick stem in each leaf. A paring knife works best.
Mixing bowl – A big bowl makes it easier to combine your meat and rice filling evenly.
Cutting board – For prepping cabbage leaves and rolling them like a pro.
Full-Size Blender – is a powerful kitchen appliance for making smoothies, soups, and sauces in large batches.
3-in-1 Air Fryer – This versatile 3-in-1 air fryer offers Air Fry for healthier meals with less oil, Bake for bakery-quality desserts and treats, and Reheat to bring leftovers back to life with crispy, flavorful results
Servings and timing
This recipe yields approximately 8 servings, requires about 20 minutes of preparation time, and needs at least 6 hours of chilling time for proper setting.
Storage/reheating
Store the cheesecake in the refrigerator, covered, for up to 4 days to maintain freshness and texture. For longer storage, you can freeze individual slices wrapped tightly in plastic wrap and place them in an airtight container for up to 2 months. To serve, thaw overnight in the refrigerator. This dessert does not require reheating and is best enjoyed chilled.
Variations and Customizations
One of the best things about this Oreo No-Bake Cheesecake is how easy it is to customize. You can adjust flavors and textures to suit your taste or occasion.
For a chocolate lover’s twist, try adding melted dark chocolate into the filling. This creates a richer and more decadent version that pairs beautifully with the Oreo base.
If you prefer a lighter version, you can substitute part of the cream cheese with Greek yogurt. I tried this once, and it gave a slightly tangy flavor while reducing the heaviness.
You can also experiment with different Oreo flavors. Mint Oreos add a refreshing touch, while golden Oreos create a vanilla-based cheesecake that feels lighter and sweeter.
For added texture, consider topping the cheesecake with whipped cream, chocolate ganache, or crushed Oreos just before serving. Fresh berries can also bring a refreshing contrast to the richness.
If you want individual portions, divide the crust and filling into small jars or cupcake liners. This makes them perfect for parties or easy grab-and-go desserts.
For a gluten-free option, simply use gluten-free chocolate sandwich cookies instead of standard Oreos. The result is just as delicious.
Nutrition and Dietary Info
| Nutrient | Per Serving |
| Calories | 420 kcal |
| Protein | 5 g |
| Carbs | 32 g |
| Fat | 30 g |
| Saturated Fat | 18 g |
| Fiber | 1 g |
| Sugar | 22 g |
| Sodium | 280 mg |
This cheesecake is rich and indulgent, making it ideal as an occasional treat rather than an everyday dessert.
Expert Tips & Customizations
Use room temperature cream cheese
This ensures a smooth, lump-free filling that blends effortlessly.
Whip cream to stiff peaks
Properly whipped cream is key to achieving a stable and fluffy texture.
Chill overnight for best results
While 6 hours works, overnight chilling gives the perfect consistency.
Press crust firmly
A well-packed crust prevents crumbling when slicing.
Fold gently
When combining whipped cream and filling, fold slowly to maintain airiness.
FAQs
Can I make this cheesecake ahead of time?
Yes, it is actually better when made a day in advance as it allows the flavors to develop and the texture to fully set.
Can I freeze Oreo no-bake cheesecake?
Absolutely, wrap it tightly and freeze for up to 2 months, then thaw in the refrigerator before serving.
Why is my cheesecake not firm?
It likely needs more chilling time or the whipped cream was not beaten to stiff peaks.
Can I use low-fat cream cheese?
Yes, but the texture may be slightly less rich and creamy.
Do I need gelatin for this recipe?
No, the whipped cream provides enough structure for the cheesecake to set properly.
Can I use store-bought whipped topping?
Yes, but fresh whipped cream gives a better flavor and texture.
Conclusion
This Oreo No-Bake Cheesecake is the perfect combination of simplicity and indulgence. With its creamy filling, crunchy crust, and rich cookies-and-cream flavor, it is a dessert that never fails to impress. Whether you are making it for a special occasion or just to satisfy a sweet craving, it delivers every time. Once you try it, it will quickly become a favorite in your dessert rotation.
Hungry for more? Visit our website for full recipes and follow us on Pinterest for daily foodie inspo you’ll love to pin!